

The check engine light is an important indicator on a vehicle’s dashboard that alerts the driver to potential issues with the engine or emissions system. Understanding how to test the check engine light can save time and money by providing insight into the problem before taking the vehicle to a mechanic. This DIY guide will provide an overview of the check engine light, explain how to interpret the codes it displays, and guide you through the process of testing and diagnosing the issue. By taking control of your vehicle’s diagnostics, you can determine the problem and decide whether to address it yourself or seek professional help.
Overview of the check engine light and its importance
The check engine light is a crucial feature on a vehicle’s dashboard that alerts the driver to potential issues with the engine or emissions system. It serves as an early warning system, allowing the driver to address problems before they become more serious and costly. Ignoring the check engine light can lead to further damage to the vehicle and potentially compromise its overall performance and safety. Testing the check engine light yourself can help you quickly diagnose issues and take appropriate action.
Benefits of testing the check engine light yourself
Testing the check engine light yourself has several benefits.
- Cost Savings: By diagnosing the issue on your own, you can save money on expensive diagnostic fees at a mechanic.
- Quick Response: Testing the check engine light allows you to address potential problems promptly, preventing further damage to your vehicle.
- Knowledge and Empowerment: Understanding the issue and its codes gives you insight into your vehicle’s health and allows you to make informed decisions about repairs.
- Timely Maintenance: Testing the check engine light helps you prioritize essential repairs, ensuring your vehicle runs smoothly and efficiently.
- Peace of Mind: By resolving issues promptly, you can drive with confidence, knowing your vehicle is in good condition.
Understanding the Check Engine Light
The check engine light is a crucial indicator of potential issues in your vehicle. It can come on due to various reasons, such as a malfunctioning sensor, a loose gas cap, or more serious engine problems. Interpreting the codes displayed by the check engine light can provide valuable insight into the specific issue at hand and guide your next steps for diagnosis and repair.
Common reasons why the check engine light may come on
The check engine light may come on due to various reasons, including a malfunctioning oxygen sensor, a loose or damaged gas cap, a faulty mass airflow sensor, a problem with the ignition system, or a misfiring spark plug. Other potential causes include issues with the catalytic converter, the evaporative emissions control system, or the engine’s emissions system.
Interpreting the codes displayed by the check engine light
When the check engine light comes on, it typically means that there is a problem with the vehicle’s engine or emissions system. To understand the specific issue, you can use an OBD-II scanner to retrieve the diagnostic trouble codes (DTCs) stored in the vehicle’s onboard computer. These codes are alphanumeric and correspond to specific problems. You can then refer to a code guide or search online to interpret the meaning of the codes and diagnose the issue.
Gathering the Necessary Tools
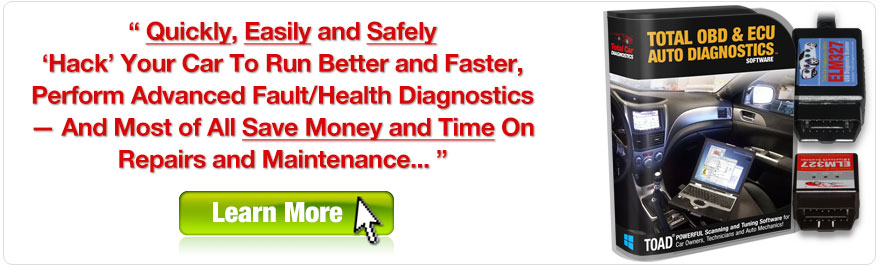
To test the check engine light yourself, you will need a few tools. The most essential tool is an OBD-II scanner, which can be purchased online or borrowed from an auto parts store. Additionally, it’s helpful to have a smartphone or tablet to access code guides or online resources for interpreting the diagnostic trouble codes. These tools will enable you to effectively diagnose the issue indicated by the check engine light.
Tools required for testing the check engine light
To test the check engine light yourself, you will need a few tools. The most essential tool is an OBD-II scanner, which can be purchased online or borrowed from an auto parts store. Additionally, it’s helpful to have a smartphone or tablet to access code guides or online resources for interpreting the diagnostic trouble codes. These tools will enable you to effectively diagnose the issue indicated by the check engine light.
How to acquire and use an OBD-II scanner
To acquire an OBD-II scanner, you can purchase one online or borrow from an auto parts store. Make sure to choose a scanner that is compatible with your vehicle’s make and model. To use the scanner, locate the OBD-II port in your car, which is usually found underneath the dashboard. Plug in the scanner and turn on the ignition. Follow the scanner’s instructions to retrieve the diagnostic trouble codes (DTCs) and interpret them using code guides or online resources.
Performing the Check Engine Light Test
To perform the check engine light test, follow these steps:
- Start by connecting an OBD-II scanner to your vehicle’s OBD-II port, usually found beneath the dashboard.
- Turn on the ignition and let the scanner power up.
- Follow the scanner’s prompts to retrieve the diagnostic trouble codes (DTCs) displayed by the check engine light.
- Use code guides or online resources to interpret the DTCs and determine the potential issue. This will help you understand what needs to be fixed.
Step-by-step instructions for testing the check engine light
To test the check engine light, start by connecting an OBD-II scanner to the vehicle’s OBD-II port beneath the dashboard. Then, turn on the ignition and let the scanner power up. Follow the scanner’s prompts to retrieve the diagnostic trouble codes (DTCs) displayed by the check engine light. Refer to code guides or online resources to interpret the DTCs and determine the potential issue.
Interpreting the results and determining the issue
Once the diagnostic trouble codes (DTCs) are retrieved from the OBD-II scanner, it is important to interpret them correctly. Refer to code guides or online resources to understand the meaning of each code. The codes will provide insights into the specific issue that triggered the check engine light, such as a faulty sensor, fuel system problem, or emission issue. This information will help you determine the appropriate steps to address the problem.
Fixing the Issue
Once the issue indicated by the check engine light is identified, there are various options for fixing the problem. Depending on the severity of the issue and your level of expertise, you can choose to address it yourself or seek professional help. For minor issues, DIY solutions such as tightening a loose gas cap or replacing a faulty sensor may be sufficient. However, for more complex problems or if you are unsure about your ability to fix the issue, it is recommended to consult a mechanic or automotive technician. They have the knowledge and experience to diagnose and resolve the issue effectively.
Options for addressing the problem indicated by the check engine light
When the check engine light comes on, there are several options for addressing the underlying problem. One option is to diagnose and fix the issue yourself, if you have the necessary skills and tools. This can include replacing a faulty sensor or tightening a loose gas cap. Another option is to consult a professional mechanic or automotive technician who can accurately diagnose and fix the problem. They have the knowledge and expertise to handle complex issues and ensure a proper repair. It’s important to address the problem promptly to avoid further damage to your vehicle.
DIY solutions and when to seek professional help
When addressing the problem indicated by the check engine light, there are DIY solutions that can be attempted, such as tightening a loose gas cap or replacing a faulty sensor. However, if the issue is more complex or requires specialized knowledge, it is recommended to seek professional help. Professional mechanics or automotive technicians have the expertise to accurately diagnose and fix the problem, ensuring a proper repair and preventing further damage to your vehicle.
Conclusion
In conclusion, testing the check engine light yourself can provide valuable insight into the health of your vehicle and potentially save you time and money. By understanding the common reasons for the light coming on and how to interpret the codes, you can diagnose and address issues promptly. Remember to regularly maintain your vehicle and seek professional help when needed to keep your car running smoothly.
Benefits of testing the check engine light yourself
Testing the check engine light yourself offers several benefits. Firstly, it allows you to save time and money by diagnosing the issue without having to take your vehicle to a mechanic. Secondly, it provides you with valuable insight into the health of your car, helping you identify and fix problems promptly. By taking control of the diagnostic process, you can make informed decisions about the necessary repairs and avoid unnecessary expenses.
Tips for maintaining a healthy vehicle and preventing future issues
Regular maintenance is crucial for keeping your vehicle in good condition and preventing future issues. Here are some tips to help you maintain a healthy vehicle:
- Follow the recommended service schedule provided by your vehicle’s manufacturer.
- Change the oil and oil filter regularly.
- Check and replace air filters when necessary.
- Inspect and maintain the battery and charging system.
- Keep tires properly inflated and rotate them regularly.
- Pay attention to any unusual sounds, smells, or vibrations and address them promptly.
- Avoid aggressive driving and excessive idling.
- Keep your vehicle clean, both inside and out.
- Use high-quality fuel and fluids.
- Store your vehicle in a covered area, if possible.
By following these tips, you can prolong the lifespan of your vehicle and minimize the chances of encountering problems in the future.


