

The check engine light can be the bane of every driver’s existence. Its enigmatic presence on the dashboard can cause panic, frustration, and confusion. However, fear no more! In this comprehensive guide, we will delve into the intricate world of check engine light reset techniques to provide you with swift solutions like a true professional. Whether you’re a seasoned mechanic or a novice car owner, join us as we unlock the secrets behind mastering the art of resetting that pesky check engine light once and for all. Get ready to regain control over your vehicle’s health with confidence and ease!
Understanding the Check Engine Light: Decoding the Mystery
What is the check engine light?
The check engine light, also known as the malfunction indicator lamp (MIL), is an important warning system in your vehicle. It illuminates when there is a potential issue with the engine or emission control system.
Why is it important to address the check engine light?
Ignoring the check engine light can lead to bigger and costlier problems down the road. When your vehicle’s computer detects a problem, it stores a diagnostic trouble code (DTC) that provides insight into what may be wrong. Getting this code read by a professional will help identify and address any underlying issues before they escalate.
How can I decode the check engine light?
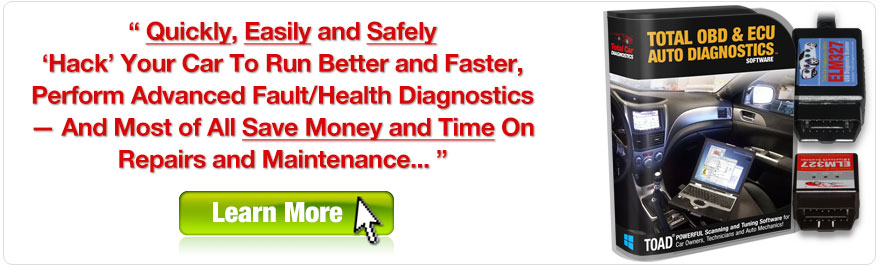
- Get an OBD-II scanner: Invest in an on-board diagnostics (OBD)-II scanner or visit a mechanic who can hook up theirs.
- Retrieve DTCs: Connect your OBD-II scanner to your vehicle’s diagnostic port and retrieve any stored DTCs.
- Interpret codes: Use online resources, repair manuals, or consult with a professional to interpret what each code means for your specific make and model.
- Troubleshoot or seek assistance: Depending on the severity of the issue indicated by the codes, you could choose to troubleshoot yourself or take it to a qualified technician for further inspection.
Addressing check engine light issues promptly saves time, money, and ensures optimal performance of your vehicle—don’t overlook its importance!
Diagnostic Tools: The Key to Unlocking the Check Engine Light
The importance of diagnostic tools
Diagnostic tools are essential for effectively resetting the check engine light and identifying any underlying issues with your vehicle. These tools provide valuable information about the various systems and components that make up your car, helping you pinpoint the exact cause of the problem. By using these tools, mechanics can access trouble codes stored in the vehicle’s computer system, which act as clues to help diagnose the issue at hand.
Types of diagnostic tools
There are several different types of diagnostic tools available, each serving a specific purpose in diagnosing check engine light problems. One commonly used tool is an OBD-II scanner, which connects to your car’s diagnostic port and retrieves trouble codes from its computer system. These scanners come in various forms, from handheld devices to smartphone apps. Additionally, there are more advanced scan tools that offer additional features such as live data streaming and module coding capabilities.
Another type of diagnostic tool frequently used by professionals is a multimeter. This versatile device helps measure electrical voltages, currents, resistances, and other important parameters within your vehicle’s electrical system. By utilizing a multimeter during diagnosis, mechanics can assess whether certain components such as sensors or wiring harnesses are functioning properly or require replacement.
Whether it is an OBD-II scanner or a multimeter, having access to these invaluable diagnostic tools ensures accurate diagnoses and efficient solutions for resolving check engine light issues.
Common Causes of the Check Engine Light: Identifying the Culprits
When your check engine light comes on, it’s crucial to quickly identify and address the underlying issue. Here are some common culprits behind this warning signal:
- Faulty Oxygen Sensor: As a vital component of your vehicle’s emissions system, a failing oxygen sensor can trigger the check engine light.
- Loose or Damaged Gas Cap: A loose or damaged gas cap not only causes fuel evaporation but also prompts an illuminated check engine light.
- Catalytic Converter Issues: A malfunctioning catalytic converter leads to decreased fuel efficiency and higher emissions levels, resulting in a lit up dashboard warning.
- Spark Plug Problems: Worn-out or faulty spark plugs can disrupt the air-fuel mixture within your engine, triggering the check engine alert.
- Mass Airflow Sensor Malfunction: If your car’s mass airflow sensor (MAF) fails to accurately measure incoming air, you may experience rough idling and reduced power – along with an activated check engine light.
DIY Check Engine Light Reset: Step-by-Step Instructions for Beginners
Resetting your check engine light can be a simple task if you follow these step-by-step instructions:
- Check the gas cap: Start by checking your gas cap. A loose or damaged gas cap is often the culprit behind an illuminated check engine light. Simply tighten it or replace it if needed.
- Disconnect the battery: If tightening the gas cap doesn’t solve the issue, disconnecting the battery may do the trick. Turn off your vehicle and locate the negative terminal of your car’s battery. Remove its cable and wait for at least 15 minutes before reconnecting it.
- Use a code reader/reset tool: If neither of these methods works, using a code reader or reset tool is another option to consider. These tools can be plugged into your vehicle’s diagnostic port to read error codes and reset settings that trigger the check engine light.
Remember, resetting your check engine light should only be used as a temporary solution to determine if there is an ongoing issue with your vehicle. If after following these steps, in addition to others outlined in our professional guide, you find that your check engine light continues to illuminate, it may be time to consult a trained technician for further diagnostics and repairs.
Advanced Reset Techniques: Pro Tips for Quick and Effective Solutions
Using an OBD-II Scanner
- An OBD-II scanner is a vital tool that allows professionals to reset check engine lights efficiently.
- Connect the scanner to the vehicle’s diagnostic port, typically located under the dashboard or near the driver’s seat.
- Follow the specific instructions provided with your scanner to access and clear any trouble codes triggering the check engine light.
- Ensure that you address any underlying issues causing the code before attempting a reset.
Disconnecting and Reconnecting Battery
- Another method is disconnecting and reconnecting the vehicle’s battery, which can also prompt a reset of error codes.
- Start by turning off all electrical components in your car and removing both positive (+) and negative (-) battery cables from their terminals.
- Leave them disconnected for at least 15 minutes to allow residual power within your car’s computer system to dissipate fully.
- After reconnection, turn on your vehicle without starting it, leave it in this position for another few minutes before starting up again.
Consult with Professionals
- If you’re still unable to clear persistent check engine lights after attempting various methods yourself, consulting professional mechanics or technicians might be necessary.
- Their expertise will enable thorough diagnostics using specialized tools beyond what general consumers have access to—such as emission gas analyzers—to pinpoint more complex issues related to catalytic converters or oxygen sensors accurately.
Remember when troubleshooting any issue relating to check engine lights; resolve root causes rather than just resetting symptoms temporarily for long-term solutions!
Ongoing Maintenance: Preventing the Check Engine Light from Reappearing
Regularly perform preventative maintenance on your vehicle to reduce the chances of the check engine light coming back on. Here are some tips to keep in mind:
- Schedule regular tune-ups: Bring your car to a trusted mechanic for routine inspections and maintenance checks. This will help identify any potential issues before they worsen and trigger the check engine light.
- Keep up with oil changes: Regularly changing your vehicle’s oil is essential for its overall health. Dirty or low oil can cause various engine problems, leading to an illuminated check engine light.
- Maintain proper tire pressure: Incorrect tire pressure not only affects fuel efficiency but can also result in stress on other components, like the transmission or exhaust system, which may prompt the check engine light.
- Check gas cap tightness: A loose or damaged gas cap can lead to a fuel vapor leak, triggering an emission-related error code that illuminates the check engine light. Properly tighten or replace any faulty gas caps as needed.
Continuing these simple practices will promote better performance and reliability while minimizing false alarms from that pesky little yellow warning indicator on your dashboard!
When to Seek Professional Help: Knowing Your Limits
Knowing when to seek professional help is crucial when it comes to resetting your check engine light. While there are some simple tasks you can perform on your own, certain issues require the expertise of a trained mechanic.
Signs You Should Call a Professional
Here are some signs that indicate it’s time to bring in the professionals:
- Complex Diagnostic Codes: If your car’s computer system reveals complex diagnostic codes, it’s best to consult with a professional technician who has the specialized knowledge and equipment to decipher these codes accurately.
- Recurring Check Engine Light: If the check engine light keeps reappearing after you’ve attempted various resets, it suggests an underlying problem that needs professional attention.
- Lack of Mechanical Experience: If you’re not well-versed in automotive systems or lack confidence in tackling mechanical issues, contacting a certified technician eliminates any potential mistakes or costly damages.
Remember, while DIY solutions can be cost-effective and fulfilling for minor problems, never hesitate to seek out professional assistance if needed – it saves both time and money in the long run!
Troubleshooting Guide: Troubleshooting Common Issues in Check Engine Light Reset
Troubleshooting Common Issues in Check Engine Light Reset
When attempting to reset the check engine light, it is important to be aware of common issues that may arise. Here are some troubleshooting tips:
- Check for a loose gas cap: A loose or missing gas cap can trigger the check engine light. Make sure the gas cap is tightened properly and securely.
- Ensure all codes have been cleared: After resetting the check engine light, make sure that all diagnostic trouble codes (DTCs) have been cleared from the vehicle’s computer system. Failure to do so may result in the light coming back on.
- Inspect the battery connection: A weak or faulty battery connection can cause issues with resetting the check engine light. Ensure that the battery terminals are clean and securely connected.
- Address any underlying mechanical problems: If the check engine light continues to come on after being reset, there may be an underlying mechanical issue with your vehicle. It is recommended to consult a professional mechanic who can diagnose and repair any necessary components.
Remember, troubleshooting common issues during check engine light resets can help you avoid recurring problems and keep your vehicle running smoothly.


