
In today’s modern society, the check engine light has become a common yet enigmatic feature in our cars. It seemingly appears out of nowhere, leaving drivers puzzled and uncertain about what is wrong with their vehicle.
The Check Engine Light: The Essential Guide to Understanding and Utilizing Diagnostic Code Readers aims to demystify this perplexing warning signal by providing an in-depth understanding of its purpose and how it can be effectively utilized to diagnose car troubles.
This comprehensive guide will equip both seasoned mechanics and novice car owners with the knowledge they need to interpret diagnostic codes accurately, saving them time, money, and unnecessary frustration. So join us as we delve into the fascinating world of automotive diagnostics and unlock the secrets behind that little glowing symbol on your dashboard.
The Origins of the Check Engine Light: A Brief History
The check engine light, also known as the malfunction indicator lamp (MIL), has become a mainstay in modern vehicles. But its origins trace back to the late 1960s when cars started adopting electronic fuel injection systems. These systems introduced sensors that monitored various components of the engine, allowing for better control and efficiency.
As vehicle technology advanced, so did the need for a standardized system to diagnose and communicate issues with these complex electronic systems. In response, the Society of Automotive Engineers (SAE) developed a set of diagnostic trouble codes (DTCs) in 1981. This DTC system allowed technicians to identify specific problems by reading codes generated by onboard computer systems.
Today, the check engine light serves as an important tool for both drivers and mechanics alike. Its purpose is to alert drivers to potential problems with their vehicles’ engines or emissions systems. By understanding what triggers this warning light and utilizing diagnostic code readers, individuals can proactively address issues before they escalate into major repairs or preventable breakdowns.
Decoding the Check Engine Light: Understanding the Different Warning Signals
When your check engine light illuminates on your dashboard, it is important to understand what it means. Here are some common warning signals and their meanings:
- Steady Light: A steady check engine light indicates a less serious issue that may not require immediate attention but should still be addressed as soon as possible. This could be a problem with the emission control system or an oxygen sensor malfunction.
- Flashing Light: A flashing check engine light signifies a severe issue that needs immediate attention. It typically indicates an engine misfire, which can cause damage if left unaddressed.
- Intermittent Illumination: If your check engine light occasionally turns on and off, this may indicate an intermittent problem such as a loose gas cap or faulty sensors. While not immediately urgent, these issues should still be resolved to prevent potential complications down the line.
Remember that each vehicle’s diagnostic code reader might provide additional information specific to your make and model of car.
How the Check Engine Light Works: Exploring the Diagnostic Code System
The check engine light is part of a sophisticated system that helps monitor and diagnose potential issues with your vehicle. When certain problems are detected by sensors, they trigger the check engine light to turn on, alerting you to an issue that needs attention.
Here’s how it works:
- Sensors placed throughout your car detect abnormalities in various components such as the engine, emissions system, or fuel system.
- These sensors send signals to the onboard computer known as the powertrain control module (PCM).
- The PCM analyzes these signals and compares them to a set of predefined values stored in its memory.
- If the readings fall outside these predetermined ranges, indicating a possible problem, it generates a diagnostic trouble code (DTC) specific to that issue.
- The DTC helps technicians identify what part of your vehicle is experiencing trouble and guides them in troubleshooting and fixing it.
Understanding this diagnostic code system is crucial when using a code reader or visiting an auto repair shop. By deciphering and addressing these codes promptly, you can save time and money by preventing further damage to your vehicle.
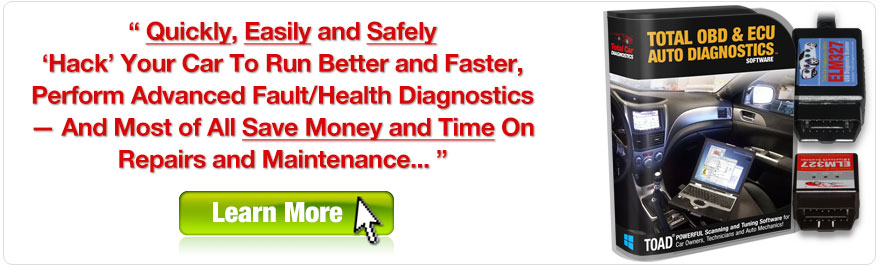
Choosing the Right Diagnostic Code Reader: A Buyer’s Guide
Considering the Compatibility
When choosing a diagnostic code reader, it is crucial to consider its compatibility with your vehicle. Not all code readers are created equal, and some may only work with specific makes or models. Before making a purchase, ensure that the code reader you choose is compatible with your vehicle’s make and model. This information can usually be found in the product description or specifications.
Evaluating Functionality
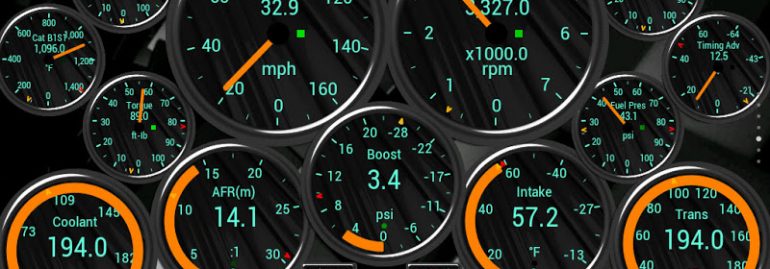
Another important factor to consider when choosing a diagnostic code reader is its functionality. Different code readers offer different features, so it is essential to determine which functionalities are most important for your needs. Some common features include reading and clearing codes, displaying live data streams, accessing freeze frame data, and conducting system tests. Evaluate what functions are necessary for diagnosing issues with your vehicle and choose a code reader that offers those capabilities.
Assessing Ease of Use
In addition to compatibility and functionality considerations, it is crucial to assess the ease of use when selecting a diagnostic code reader. Look for devices with clear instructions and user-friendly interfaces that make navigation intuitive even for those less experienced in automotive diagnostics. Compact size and portable design can also be advantageous as they allow for convenient storage and usage in various locations.
Step-by-Step Guide to Using a Diagnostic Code Reader: From Connection to Interpretation
1. Prepare your vehicle and code reader.
- Before connecting the diagnostic code reader, ensure that your vehicle is parked in a safe location with the ignition turned off.
- Locate the OBD-II port, typically found beneath the dashboard on the driver’s side.
- Familiarize yourself with your code reader’s user manual for specific instructions.
2. Connect the diagnostic code reader.
- Plug one end of the OBD-II cable into the port on your vehicle.
- Attach the other end of the cable to your code reader until it locks securely.
3. Power on and retrieve codes.
- Turn on both your vehicle’s ignition and your diagnostic code reader.
- Follow prompts displayed on-screen or refer to your user manual for retrieving trouble codes from your vehicle’s computer system.
4. Interpret and understand trouble codes.
- Refer to an online database or consult resources provided by manufacturers of diagnostic tools for interpreting specific trouble codes associated with make and model of your vehicle.
By following these steps, you can easily use a diagnostic code reader to identify potential issues with your vehicle by retrieving and understanding trouble codes. Remember that professional assistance may be required for more complex problems or if you are unsure about interpreting certain error codes.
Common Check Engine Light Codes: Troubleshooting the Most Frequent Issues
One common check engine light code is P0420, which indicates a problem with the catalytic converter. This could be caused by issues such as a faulty oxygen sensor or an exhaust leak. To troubleshoot this issue, it may be necessary to replace the oxygen sensor or inspect and repair any leaks in the exhaust system.
Another frequently encountered code is P0300, which suggests random engine misfires. This could be due to a range of factors including worn spark plugs, faulty ignition coils, or a clogged fuel injector. To resolve this issue, it is recommended to perform regular maintenance on spark plugs and ignition coils and ensure that fuel injectors are clean and functioning properly.
P0171 is yet another common check engine light code that points towards a problem with the air-fuel ratio being too lean. This can arise from issues like vacuum leaks or problems with the mass airflow sensor (MAF). It may be necessary to seal any vacuum leaks or clean/replace the MAF sensor in order to troubleshoot and address this error code effectively.
Advanced Tips and Tricks for Utilizing Diagnostic Code Readers: Maximizing Efficiency
1. Update your code reader regularly
Make sure to regularly update your diagnostic code reader to ensure it is equipped with the latest software and error codes. This will enable it to accurately diagnose newer vehicle models and help you avoid potential compatibility issues.
2. Use advanced scan tools for comprehensive diagnosis
Consider investing in an advanced scan tool that offers more features, such as live data streaming and graphing capabilities. These tools provide real-time information from various sensors, allowing you to pinpoint specific issues quickly.
3. Familiarize yourself with manufacturer-specific codes
In addition to generic OBD-II codes, many manufacturers have their own set of diagnostic trouble codes (DTCs). Take the time to research and familiarize yourself with these manufacturer-specific codes, as they can provide more detailed information about a specific problem in your vehicle.
4. Contextualize the code readings
Remember that diagnostic trouble codes are just clues pointing towards a potential problem; they do not always directly indicate what needs fixing. It’s crucial to interpret the code within the context of other symptoms or observations to gain a complete understanding of the issue at hand.
5. Keep an organized record of all diagnostic scans performed
Maintain thorough documentation of all scans you perform on your vehicle using a diagnostic code reader. Include date, time, description of symptoms, retrieved DTCs, any repairs made or parts replaced along with their respective dates.
When to Seek Professional Help: Understanding the Limitations of Diagnostic Code Readers
Diagnostic code readers can be helpful tools for identifying potential issues with your vehicle, but it’s important to understand their limitations. Here are some instances when seeking professional help is necessary:
- Ambiguous Error Codes: Diagnostic code readers often provide generic error codes that may not pinpoint the exact problem. This can lead to confusion and misdiagnosis if you’re not experienced in interpreting these codes.
- Complex Repairs: Certain repairs require specialized knowledge and equipment that diagnostic code readers don’t possess. For example, fixing an electrical issue or replacing a faulty sensor might go beyond the capabilities of a DIY-enthusiast.
- Intermittent Problems: Some problems with your car may only occur sporadically, making them difficult to diagnose using a code reader alone. A trained mechanic will have the expertise to troubleshoot these intermittent issues effectively.
Remember, while diagnostic code readers can be useful for basic troubleshooting, they should not replace professional assistance when needed.


